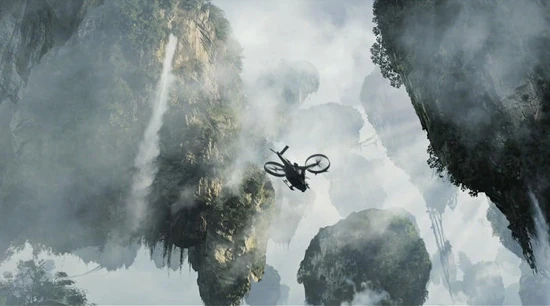
Creating a world with sound is a lot more important than you can imagine. When you are working on a film and you are wandering why something does not sound right with the sound effects or your dialogue. None of that is going to sound right without the proper world to place these sounds into. Working with backgrounds could well be one of the most important jobs in sound design to be given, because you have to escape the image on screen that you are working with. When working with film this becomes step one for sound. Yes at first you will think you need massive impact sounds and fighting sounds but you must first ask yourself "where is this set in?" That is the main question that must be answered. You could be working with films like the hobbit for example and you decide to put a police siren in the background. That is not going to fit. Even when you are working with backgrounds and are only working with room ambience, as a sound designer you need to breakout and build a universe that is outside of a small room that the scene may be set in.
To make this point clear imagine a scene that is set in a living room. The first thing that comes to your mind will be a television, a clock ticking or anything that should be in a living room making sound. Then ask yourself "What is outside?" You suddenly have a bigger picture to work with such as wind, cars crossing the window, people talking outside as they walk past the house. You can take this even further as to describe sounds that would possibly be half a mile away such as a busy motorway in the distance, a near by airport, a heard of sheep running across the road. There is a whole word waiting for you to be made! Make the world your own. It can fit the scene easily by mixing it so the backgrounds are distant. Mixing is the key to make sure that you get the correct feel of the backgrounds and also towards making the scene a lot less quieter which is usually not good to have (unless you are working with horror).
To show an example of how to create a world you need to look at the sci-fi genre of film. To pinpoint further lets look at Avatar. The backgrounds in the film are astonishingly accurate to what they look like, you want to go deeper and explore the world of Pandora. When you see the floating rocks for the first time you get a good listen to what the world of Pandora really sounds like and it is so vivid that you feel like you are there when you are watching it. This is what you need to aim for when you are doing backgrounds. Get the feel of reality and breakout of the box!
(For this Blog post I will be referring to the ShooterGame level created by Unreal for educational use. This can be found in the "Learn" Section of the Epic Games Launcher for Unreal Engine 4)
Getting started with editing game audio and messing about with some cool features in game engines for audio there is always one thing standing in your way between you and that awesome procedural audio. That is the horror of scripting. To start learning anything complex you have to first make sure you do not go overboard and start thinking you can do a whole game's audio in a week or two with no experience. You have to start off slow and get used to running into errors that you will see way to often.
To start off strong you must know the basics. This is the user interface (UI) of the game engine that you are working with. Luckily with Unreal Engine 4, it is pretty easy to wrap your head around the interface, as it has helpful tips enabled for when you scroll over functions. Do this and learn your way around the engine as it does help when it comes to fast and efficient workflow. Once you think you know what everything does you now have knowledge of the engine and what it does. Yes some features in the engine you may not use. However they are good to know when it comes to communicating with your client you are working for, or just for knowledge in general.
We now come to the fun part for audioheads. That is importing the audio. First things first, when you import the audio the best idea is to have a bunch of sounds to work with. If you want your sound to be somewhat of a 3D sound you need to make the .WAV file of your audio into what is called a Sound Cue. You can find these in the "Add New" drop box in the content browser and find sounds - sound cue. Once you have done that you must give it a sensible name for what that sound is going to be. After the Sound Cue has been created, to bring up the blueprint window you must double click the sound cue you wish to edit. The window at first will appear with an output. This is where everything will result to in the end of your code no matter what you are working on with sound cues. The most basic of audio implementation is clicking and dragging in your sound from the content browser in the main window over to the new blueprint window. This will then give the sound its own node. You now need to create a link between the new sound node and the output. On each node there is an Input and Output circle (This depends on the node). You just need to click and drag one link to the other and you should see what you see below.
This is a simple audio entity for a game. This sound now has 3D features to it when it is imported into the game level from the content browser. I will go onto more detail about this in a new post but for now if you are following along, feel free to have a go with some of your own sounds in a level. You can easily find levels from the Epic Games Launcher that comes with Unreal Engine 4 in the "Learn" section. Next time I will be going into how to randomize sounds, which can make a sound cue unique to its spot.
I would like to start this blog post to explain why I have not been able to post since November of last year. I have been working on several projects that I am yet to be able to talk about. I am having to stay quiet about most of my work so far because of reasons that I am not sure that things I post should or should not be posted. To counter act this I am now personally going to stop procrastinating and I am fully fledged to start to focus on researching what is good for my education. Anything that I find I am going to be writing about on this blog!
IT IS NOT ALL DOOM AND GLOOM HOWEVER!
I am in the process of starting a brand new portfolio using the brand new Adobe Portfolio which comes with Adobe Creative Cloud. This would be classed as probably my 6th (I think) portfolio that I have created and hopefully the last one I will create, and I shall adapt to this. I am not giving up on anything now. It is all out or nothing.
You can see this website here - seanmlp95.myportfolio.com (Domain is Temporary)
Along with my finished piece of my Dying Light Trailer re-dub!
See you all through out the coming years! Be on the look out for future blog posts that are going to be a LOT more frequent then... a month.
Today I have found a video from Sound works about one of my favourite movies, Tron: Legacy. The video includes talks about the sound design, music and dialogue edit for the film and shows the process of making all these conditions meet high expectations. What I found most interesting about the video was when the editors started to talk about the dialogue edit. As mentioned in the video, most of the set audio was almost deemed unusable because with the suits the actors had to wear had lights built into them. These suits created a noticeable humming noise coming from them and could be picked up by the audio team. Some parts of audio were saved by noise reduction technology, however most of the audio was done via ADR and you cannot notice this within the film which is always a pig plus!
This blog post is to give you an update on what I am working with on my dying light re-dub project. So far I have recorded Foley with a Zoom H4nSP. I took this into my garden at home where I then started to record running Foley, hammer hits and taps on metal to simulate climbing a ladder with a wrench (but with a hammer). I am also going to be sourcing some sounds externally for sounds that I will be unable to record in the mean time. Some of these sounds will be courtesy of the Sony Pictures Sound Effects Series. Any other sources will be sourced in future posts. I could not record outside for long because there was a forecast of rain, so I did most of the recording that I could for that day. When it started to rain I moved inside where I have an empty room to use as my studio. It is a quiet room with zero background noise when the house is quiet so it is the perfect place for quiet Foley recordings such as fabric movements and belt rustles. For the utility belt rustles I wanted to make it sound heavy so at first I used two separate belts paired together loosely to create a jingle for a belt sound as imaged below.
This then escalated into me thinking that this might not be enough for the sound. So after I recorded this I went into my kitchen and grabbed some spoons. I also grabbed my keys so I could get a good rustling sound effect for a utility belt. On a side note I may have over done it, however this could be a good thing.
I also did some fabric recording to simulate running, jumping and rolling. This was also useful for recording a flag sound effect rustling in the wind. I did this by using a thin shirt to wave about in front of my recorder to get a good sound for moving fabric. For my wind effect I wanted to record as much as possible so it could fit the entire trailer. So I sat the recorder in front of a fan for up to three minutes so I have more than I need, because I believe it is always good to have a bit more than you should because you never know what use it could have.
I have tried to use multiple programs to edit these sounds together with my trailer. However I have run into a few problems with trying to do so. My first problem was that I could not use Adobe Premiere CC anymore because my trail had run out sadly. My second problem is that my laptop does not have the power to run the video engine in Pro Tools 10 or 11 so I am unable to properly sync up the sound with the video. On a brighter note I have found something that has helped me solve my editing problem. I found an old version of Sony Vegas lying around my house which included the Sony Pictures Sound Library which is useful. This is great for me because I also have a long history with this program however I had just misplaced this program in my house and it has not been used for the last 5 years. Long time no see. This also leads my to start back up my video editing side of my skills. With this found I am now going to be doing a lot more video editing alongside my audio engineering and producing.
This post will be supporting a project that I am working on right now. This project is to replace the sound in a cinematic game trailer including music, effects and Foley. The trailer that I am replacing the sound for is the "run boy run" trailer for Dying Light. A zombie game with elements of parkour makes this the perfect trailer to remaster the sound for in a way that brings out the sound effects more in this trailer other than having music mask all the sounds in the current trailer. Below is a cue sheet of what sounds will be going where in the trailer:
(NOTE: All Foley is to be recorded on concrete. This includes jumping sounds and breathing to be included with these jumps. All running Foley will have an inherent utility belt rustle, however this will be a separate layer of sound for closer contact with the camera in the trailer.)
0:00 - 0:05:
The following image on the screen is just a warning to show that the following trailer is not suitable for children. No sounds are required here.
0:05 - 0:14:
The images on screen are short idents for the companies involved with the creation of the game (Warner Brothers, Techland). This transitions into the game trailer so sound here is key to set the mood of the trailer.
Sound Plan:
Low Oscillating bass rumble - (This would be inherent for most of the trailer). This will be used to create tension before the trailer starts.
Wind - TIME - 0.09 - 0:18. This noise will be used to set the scene before it comes in to it would be a smooth transition between the idents and the trailer itself. (This noise will carry over to the trailer footage)
Transition Out Sound - Fabric waving slowly. Time 0:11 - 0:17. - Bass rumble and wind are still present
SCENE 2: Free Running on building
Transition In Sound - Running foley on concrete. Time 0:15 - 0:17 - This is to switch views from torn flags to free runner on buildings
Jumping Foley - TIME - 0:17-0:18.
Landing Jump to Roll Foley - TIME - 0:18 - 0:20
Jump onto box sound - TIME - 0:19 - 0:20
Jump onto scaffolding Foley - TIME - 0:20 - 0:21
Running to jump Foley - TIME - 0:20 - 0:21
Landing spot sound - TIME - 0:21:22
Jumping Spot sound/Transition - TIME - 0:22:07
Layered Running Sounds - TIME - 0:22 - 0:24
Distant landing spot sound - TIME - 0:22:26
Breathing sound - TIME - 0:23:24 - 0:25:21
Plane over head effect - TIME - 0:23:24 - 0:31 (Used as transition when overhead)
Parachutes opening x4 - TIME - 0:26:02 - 0:27:03 [Done VIA umbrella opening - Multiple velocities]
Parachute in the wind FX - TIME - 0:27 - 0:29:16 [Done VIA waterproof coat fabric - Multiple takes needed] ^^^^^^^^^^^^^^^^^^^^^^^^^^^^^^^^^^^^^^^^^^^^^^^^^^^^^^^^^^^^^^^^^^^^^
For the velocity of the crate falling and the parachutes, the sounds will be automated with the volume with a slow fade. When the crate falls to its pull back speed the sounds will be amplified and will have a higher velocity sounds being played. After second velocity has been heard the sounds will fade out to a transition sound which will be a third velocity sound.
Breathing sound - TIME - 0:29:17 - 0:31:15
Running Foley x4 layers - TIME - 0:30:22 - 0:39:28 AUTOMATION: For more effect when you see a zombie for the first time. At 0:35:03 the volume of this foley will be lowered so you can still hear it but from a distance. The volume of this will become louder as the runners will get closer to the camera.
Jump sound of a bar (Spot Sound) - TIME - 0:31:29 - 0:32:09
Jump sound of a bar (Spot Sound) - TIME - 0:32:13 - 0:32:22
Footplant sound (On concrete wall) - TIME - 0:32:19 - 0:33:01
Jump sound of a bar (Spot Sound) - TIME - 0:32:27 - 0:33:10
Utility belt rustle (Used for transition via volume boost) - TIME - 0:33:05 - 0:35:02
Landing jump sound (Landing on concrete) - TIME - 0:33:09 - 0:33:20
Landing jump sound (Landing on concrete) - TIME - 0:33:21 - 0:34:02
Landing jump sound (Landing on concrete - Harder landing for transition sound) - TIME - 0:34:03 - 0:34:15
Zombie Groan sound - TIME - 0:34:22 - 0:37:28 (This effect will fade in for more effect for running up to a zombie. When the camera pans closer to the zombie the louder the sound of it will be)
Wrench pick up spot sound on wood surface - TIME - 0:37:11
Head hit with a wrench spot sound (Replicated with a watermelon being smashed and celery being crumbled for a more realistic sound) - TIME - 0:37:28
Hand placement on wooden railing to jump Foley (Replicated by hopping a wooden fence. It is a small sound but it adds more effect) - TIME - 0:39:29 - 0:40:17
Wood board smash sound effect (Replicated by layering multiple drops and breaks of wooden planes. Also used as a transition sound) - TIME - 0:41:02 - 0:42:20 (This effect will fade out quickly to match the movement from scene to scene)
Scene 3: Indoor zombie chase NOTE: This scene will be reverb heavy. Must not over do reverb otherwise it will be too much for the scene
Running Foley (This will be used as a transition. There will be a high and mid cut EQ in this and will be automated back to normal to add a transition effect to the trailers scene change) - TIME - 0:42:07 - 0:43:15 (Reverb will be needed to simulate indoor space)
Zombie horde moans (Replicated by layering multiple different zombie voice overs into one sound. Order will not matter. The less order the better the sound may be. There will be a high and mid cut EQ in this and will be automated back to normal to add a transition effect to the trailers scene change. Volume automation will be used also to suit the scene change.) - TIME - 0:42:09 - 1:00:02 (Volume automation when necessary to add distance to the zombies. Reverb will also be used to simulate indoor space)
Wrench hitting door spot sound (This will be replicated with a wrench being pushed onto a door that is wood) - 0:43:07
Wooden door hinge squeak (This will be to add emphasis to danger) - TIME - 0:43:25 - 0:47:13 (Multiple velocities will be required)
Wood Smash (Could be sourced from wood break from previous scene) - TIME - 0:46:20 - 0:48:06
Second wood smash (To lead into the camera panning to the broken wooden window barricade) - TIME - 0:48:11 - 0:49:19
Man screaming sound - TIME - 0:50:09 - 1:00:01
Second man screaming sound - TIME - 0:54:00 - 1:00:01 (These screaming sounds will have automated EQ and volume to add effect to the next scene transition)
Flesh eating sound effect (This can be replicated by messing about with a broken watermelon and crushing celery) - TIME - 0:50:16 - 0:53:00
Running Foley - TIME - 0:46:18 - 1:00:01 (Multiple layers needed with different principles to them such as zombie squelching feet and different times and types of running)
Zombie head hit spot sound (Replicated with breaking celery and water melon breaking) - TIME - 0:53:03
Concrete climb Foley - TIME - 0:52:29 - 0:54:25
Flesh eating Foley - TIME - 0:55:24 - 1:00:01
Concrete climb Foley - TIME - 0:56:29 - 1:02:09
Concrete slap spot sound - TIME - 0:59:01 NOTE: All sounds in this scene that carry close to the next scene will have automated EQ, reverb and volume to suit the house style of the sound) Scene 3: Sewer time NOTE: Reverb will be automated to make the setting for the next scene feel right. Reverb will be slightly overused in this scene to give the impression of a sewage tunnel
Zombie horde running Foley (This will consist of many layers of reverbed running and depending on how close the camera is to the running the louder it will be) - TIME - 1:00:00 - 1:24:28
Rustling of clothes - TIME - 1:02:14 - 1:08:11
Woman grunting vocals - TIME - 1:02:29 - 1:08:20
Close zombie groan vocal - TIME - 1:02:24 - 1:08:06
Foot placement spot sound - TIME - 1:04:05
Wind "swish" sound effect - TIME - 1:05:22 - 1:06:09
Electric current sound effect - TIME - 1:06:02 - 1:11:08 (Pulsating electric current sound is needed to add more effect to the electricity. Add an LFO onto the sound in post if it cannot be recorded)
Electronic Blast spot sound - TIME - 1:06:03
Main character running foley (This sound sequence will be louder than the other running foley scripted above to make the viewer seem as they are the character) - TIME - 1:06:10 - 1:07:03
Wall jump foley with landing- TIME - 1:07:04 - 1:08:24
Electronic Buzz spot sound (For impact on zombie) - TIME - 1:08:06
Zombie hit spot sound effect (Replicated via broken watermelons and crushed celery) - TIME - 1:08:06
Parkour Foley (jumping over metal pipes. Replicated with a hand plant on a large metal pipe or metal barrel for a good echo effect on the jumps) - TIME 1:11:09 - 1:16:16 (Volume will decrease near to the end of the sound as the scene is moving fast)
Volatile zombie roar (This sound vocal will be lower pitched than the rest of the zombie roars to give the sense of fear of this creature. This roar will also have a liquid effect to it for support to make the zombie creepy. Reverse a vocal and put a low EQ on for effect.) - TIME - 1:16:10 - 1:18:22 NOTE: Zombie vocals from here will sound lower pitched and will be louder to really push the sense of fear Main character running Foely (This running will be faded in and will have reverb to add effect to a leap that is coming up in the scene. - TIME - 1:18:16 - 1:21:11
Zombie grab spot sound (Replicated via fabric rustling) - TIME - 1:22:23
Woman screaming vocals - TIME - 1:23:07 - 1:27:00 (This sound will fade out near to the end to simulate length in an empty shaft)
Ladder grab (Replicated with metal scraping against metal) - TIME - 1:23:12 - 1:24:20
Ladder climb Foley - TIME - 1:27:28 - 1:36:29 (To be used as transition into the next scene)
Wind ambiance - TIME - 1:23:10 - 2:15:28 (This will have a slow fade in and out and will automate according to the trailer. Will also be used as a transition between scenes.) Scene 4: Final Scene NOTE: To declare this as the final scene it will be a lot calmer with sounds. Reverb and low EQ will be used atmospherically to represent the outside world. Ladder Foley and ambiance will include reverb at the transition at 1:29:15 from the last scene. These will be automated to suit the house style transition of the trailer.
Breathing Vocals - TIME - 1:29:20 - 1:34:09 (This will include a fade in)
Metal wrench bounce - TIME - 1:34:13 - 1:35:05
Wrench grab - TIME - 1:35:20 - 1:36:28
Grunt Vocals - TIME - 1:35:11 - 1:38:28
Clothes rustling with utility belt - TIME - 1:36:28 - 1:40:09
High pitched beeping - TIME - 1:38:28 - 1:55:14
Breathing vocals - TIME - 1:45:16 - 1:48:19 (IDEA BOX: For the shortest time of 4 frames of time the trailer will be silent for effect on impact.)
Male angry grunt vocals - TIME - 1:48:17 - 1:49:12 (Will have reverb at the end to simulate the loss of hearing in the main character)
Cricket bat impact (Replicated by breaking a water melon and layering cracking of celery on top) - TIME - 1:48:23 - 1:49:08
Blood Squirt (Done by messing about with excess watermelon or by squeezing a ketchup bottle) - TIME - 1:48:23 - 1:55:14 (This will have a slow fade out to replicate the bleeding stopping)
Body Collapse - TIME - 1:49:15 - 1:51:00
Muffled footsteps (They are muffled to simulate the sound of being knocked out) - 1:50:12 - 1:55:14
Muffled metal bounce drop - TIME - 1:50:20 - 1:51:05
Muffled Cricket bat drag across the floor - TIME - 1:52:03 - 1:55:13
NOTE: All sounds that are not direct to the two characters are automated lower in volume to add effect to the impact of the cricket bat hit. They will stay at a low volume for the rest of the scene. However the "High Pitched Beeping" sound will get louder and have a reverb and Low EQ boost to transition into the end idents and the wind ambiance will be present for the end idents. -------------------- Sounds will fade out from here to end at 2:15:28 --------------------
First up this week is a night in the D-command 5.1 studio supplied by Futureworks. I was practicing my music production in here for a few hours and I made some good progress after restarting my progress about 5 times and trying to figure out what I want to make. I created myself a build up including drums and I am going to put a melody synth over this. I just need to figure out what synth goes with my build up. I started to work on the drop of the song first however I do not have a clear view of what the melody should be because right now I have a synth like sound with a steady sound instead of a melody. I also had a slow standard bass wobble that sat well within the mix of the song. Not much progress was made in the session as a whole, however the smallest of progress can be a great help in the future.
In a lecture I was taught something very interesting about sound in almost if not everything. My tutor called Martin Salomonsen was explaining to my group about the tone of sounds and how to really get a good feel for the scene of what you are working with, it is best to be in the correct mindset for the scene. An example of this was the opening scene of Apocalypse Now where you had a man suffering from PTSD (Post Traumatic Stress Disorder) and the scene that was playing was drifting in between the Vietnam war and an apartment bedroom, with the focus drawing attention to the apartments fan light and the tail of a helicopter. When sound triggers are heard such as explosions these made a smooth transition between sound and scenes. The feel of the scene however is what was the most important. Where the scene is set is in the apartment which sound wise should be like any normal apartment. Being quiet with some ambient sounds from outside with cars and people talking. However sound designer Walter Murch, thought it would be better to put you in the main characters mind set. He did this by putting out of place jungle sounds in the scene which created unease for the people watching because they would be in the mindset of the character which creates tension also in the viewer.
In a later blog post there will be a cue sheet for what I am doing with a newly chosen game trailer that I am going to overdub. The trailer that I am overdubbing is the "Run boy run" trailer for Dying Light and that will be done and posted to here in the coming week or later. With something other than audio popping up right now I am unable to put any work into anything right now. BUT work will continue soon and blog updates will still be posted. Thanks for reading and stick around for a lot more ;D!